


Let me start by saying that iTunes is probably not the best media management project. But it is the best integrated on the Mac OS X. So playing any videos or audio files on Apple devices via iTunes is not a bad idea. This page is written for you to know how to freely add your MKV, AVI, Xvid, Divx, FLV, Flac, WAV Files to iTunes on Mac.
“I have got new iPad 32gb model. I thought I will play some song videos or movies on it from my PC. I added video files to the itunes library. But I see only few files that are added to the itunes library. I can’t add some video files to itunes library no matter what I do. Please help!”

Actually, there are no needs to worry too much about the incompatible videos or audios for iTunes, though for all Apple users, iTunes only supports MP4, MOV and M4V formats, we still can successfully add the files in iTunes with other suitable ones.
A professional iTunes video converter called Pavtube Video Converter for Mac (Windows version) can easily handle this work well. No matter for MKV, AVI, Xvid/Divx, FLV, Flac, WAV or other formats, with several steps, your files can be added in iTunes after transcoding. Why could we say so? See the below:
- As a video extractor: extract audios from various of video such as MP4, AVI, WMV, MKV, OGV, ASF, MOV, RM, MPEG, DV, etc;
- As a audio converter: convert among all kinds of audio formats such as MP3, WAV, AIFF, AAC, FLAC, AC3, AU, MP2, OGG, DTS, M4A, WMA, RA and Apple LossLess M4A, FLAC and WAV, etc;
- As a video editor: cut, adjust volume/bitrate/sample rate of audio, merge files into one, split files by chapter, etc;
- As a audio player: support playing nearly all audio formats like AIFF, AAC, FLAC, AC3, AU, MP2, MP3, WAV, OGG, DTS, M4A, WMA, RA and Apple LossLess M4A, FLAC and WAV, etc.


How to convert MKV, AVI, FLV, FLAC, WAV to iTunes compatible-format on Mac?
Step 1. Add your any video or audio files
Click “Add File” button to import media files or others which you want to convert. Or simply draw and drop your original videos into this is also available.
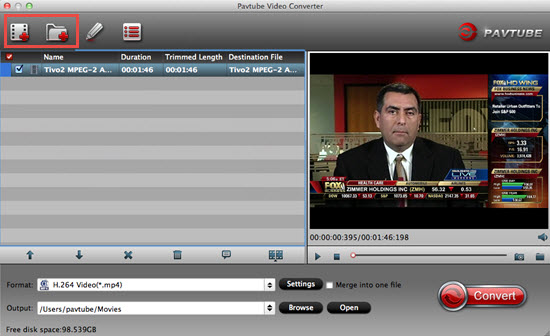
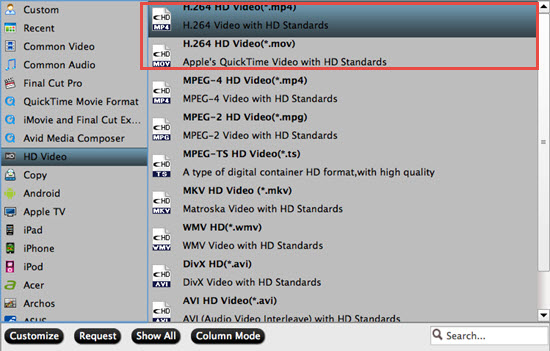
Step 2. Choose best format for iTunes
As we have mentioned above, we are glad to suggest to come to the output list to select the “HD Video > H.264 HD Video (*.mp4)” as output for videos. Or “Common Audio – MP3-MPEG LAYER-3 Audio (*.mp3)” as the best one for audios.
Step 3. Best Video Settings for iTunes
Custom your MP4 videos to make them fit your player better. You can adjust your Bit rate and Frame rate in this “Settings” UI by clicking the ‘Settings’ bottom beside the format bar. Take the following screen as a reference.

When everything is OK, you can hit the “Convert” button to start videos to iTunes
conversion. Now, you can see the conversion progress bar with the Percent Complete and remaining time showing.
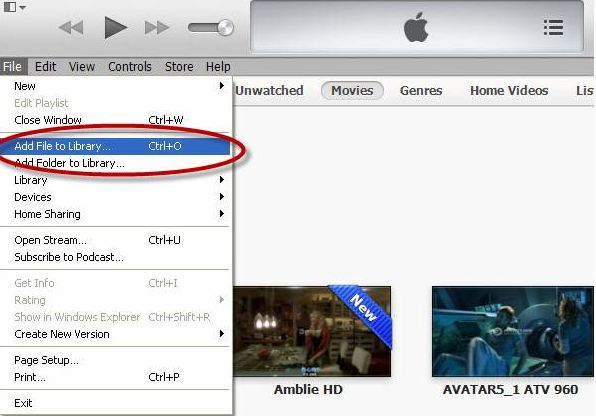
Then after transferring the files from Mac to iTunes as go to “File -> Add File to Library” to navigate to the output folder to import all the output file.


Leave a Reply